Building a Telehawk
PG3
Now that the glue has fully dried, we can
shape the neck.
First thing to do is cut the tennon to
thickness. I do this on the bandsaw. The tennon is then clamped
between the body sides, and a hand plane is used to make it
flat front and back.
Next I clamp the tennon into a vise, or
clamp the tennon and headstock to the bench and begin shaping
using a belt sander, a spoke shave, and rasps (mostly the
belt sander). WARNING, do not bring the neck right to final
width until after the fretboard has been installed.
I then use a hand plane and sanding blocks
to further smooth out the neck. I use a small block plane
to fine tune the taper of the neck width AFTER confirming
my string layout lines and fretboard overhang (still leaving
room for final fitting.)
Also, at some point you need to ramp the
end of the trussrod slot where the adjusting wrench will enter.
I use a 1/4" chisel, but you can use a dremel or ratt
tail file etc. PRS extends the trussrod slot aprox 3/4"
into the headstock and hides it w/ a cover. The disadvantage
here is you must use a short angled wrench or the short end
of the allen wrench, and you don't get much turning radius
before having to move the wrench.
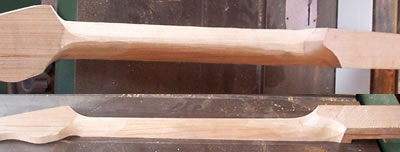
This is what the neck looks like at this
point.
The next step is to prepare the fretboard.
First thing I do is to place the fretboard where I want it
on the neck with double stick tape and mark the outline. I
then remove the fretboard, and using a curved scraper (or
small block plane, chisel used as scraper, or skip this step)
I remove a LITTLE wood along the center of the fretboard staying
at least 1/8" from the line on all sides. This causes
the edges to contact the neck just before the rest of the
fretboard, making a tight glue seam along the edge easier
to get.
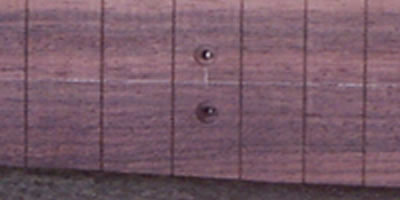
Next I install the dots. I use 1/4"
abalone dots and a 1/4" forstner bit. Carefully mark
the location of the dots and center punch them w/ an awl.
Then drill the holes with the forstner bit making sure the
insert will sit at least level w/ the highest point on the
fretboard(or stick out above a hair). The first time I tried
to install dots, I tested and dry fit stuff till I was satisfied,
then drilled the fretboard. I then went to glue them in and
all of a sudden they wouldn't go in. I leaned on them, stood
on them, tapped on them w/ a hammer, but they would not go
in. What happened? Well, the glue caused an airtight fit,
and there was a bubble of air and glue caught under the dot
which could not escape. so I now drill a small pilot hole
all the way thru the fretboard at the center of each dot.
(make sure to smooth the back of the fretboard where the drill
comes thru)
The dots are glued in place
with epoxy. If there is any gap at all, tint the epoxy with
black epoxy paint (I use a small bottle of Testers
model paint).
I now install the trussrod
following the directions. I use silicoln at both ends and
the middle to absorb any vibration.
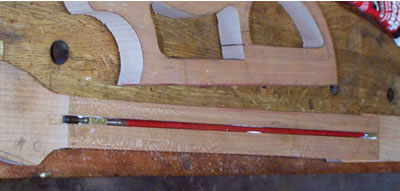
You can see where some of the silicoln
has pushed up. and the access cut at the headstock for the
allen wrench.
Next we glue on the fretboard w/ epoxy.
A trick here is to use 2 small pieces of finish nails. Drive
them into the neck slightly, and then clip them off as flush
to the neck as possible. After they are clipped there should
be a very slight bit of the nail above the fretboard and kind
of sharp. These will dig into the fretboard keeping it from
slipping when clamping, but are small enough that they will
seat fully into the fretboard when clamped (place a clamp
directly over them. Another trick is to use 1/2" wide
tape and tape over the trussrod slot. Apply the glue to the
neck, thouroughly coating it (but not too thick) then remove
the tape. the dry area will be coated by glue squeeze out,
but no glue will reach the slot, or at least not enough to
glue the trussrod in place ruining it. Use enough clamps,
but not alot of pressure.
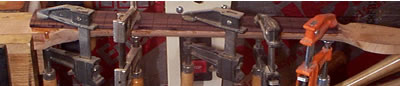
You can clamp it upside down to the bench,
or use a board along the top to help ensure the neck remains
straight. Oh yeah, one other trick; to get very tight glue
seams along the fretboard edge, scrape or sand a (very) small
void lengthwise along the center section of the fretboard.
this will put additional pressure along the edges when clamped
and requires less wood mate up perfectly flat.
Now we let the glue set up over night.
While that's happening I'll bookmatch the caps.
Page
1
2
3 4
5 6
7